
How Automotive Photography Works Explained for Photographers
June 3, 2026
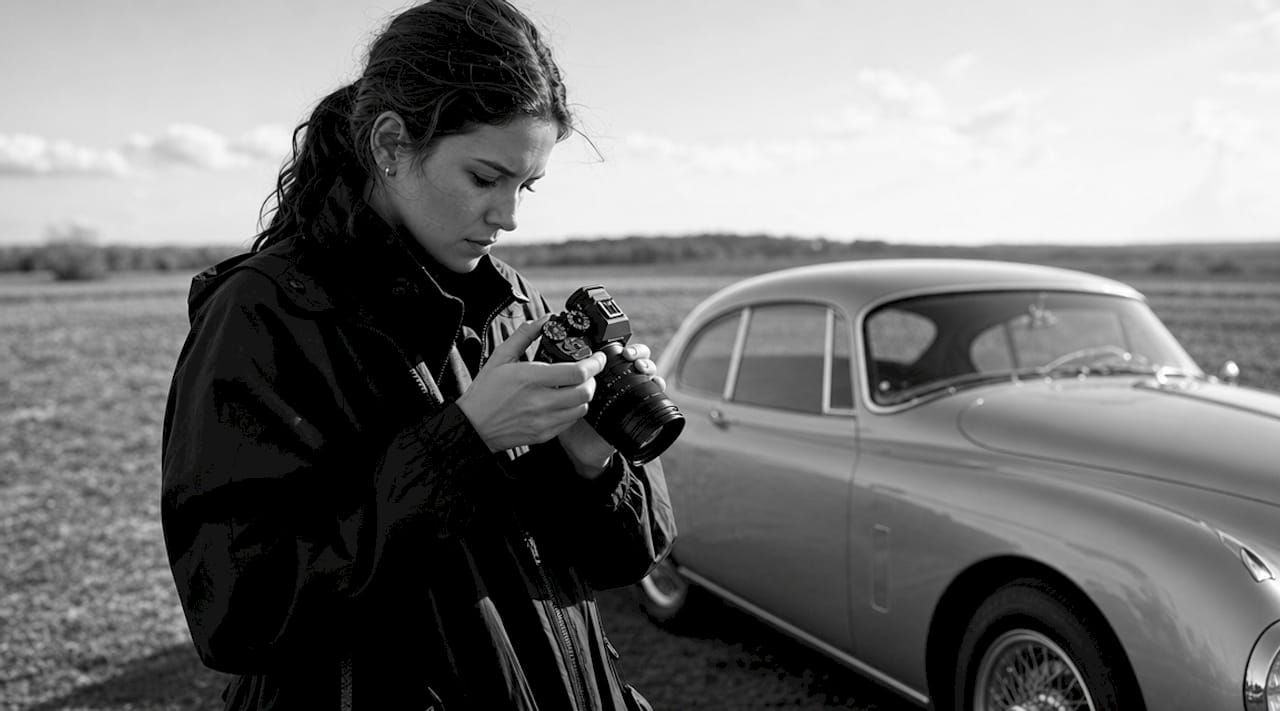
Automotive photography is the specialized discipline of capturing vehicles in ways that communicate their motion, design, and character through controlled light, deliberate angles, and precise technical execution. Unlike standard product photography, cars present a unique set of challenges: their glossy clear coats act like mirrors, their scale demands careful lens choices, and their context shapes the story entirely. Understanding how automotive photography works means mastering the interplay between camera settings, lighting conditions, reflection control, and compositional strategy. This guide breaks down every layer of that process, from gear selection to commercial workflows, so you can approach any vehicle shoot with confidence.
How automotive photography works: the technical foundation
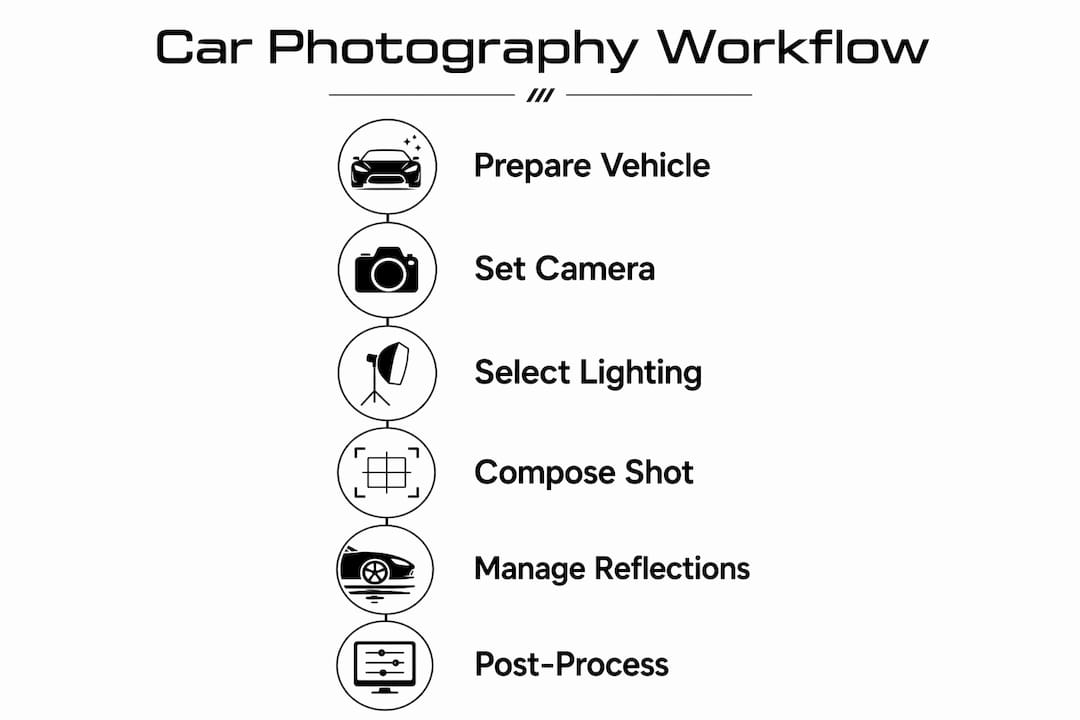
The technical side of car photography is where most beginners either build a strong foundation or develop habits that limit them for years. Getting the settings right from the start means less time fixing problems in post and more time shaping the image you actually want.
Camera settings that deliver sharp, detailed results
Aperture is your primary control for sharpness across the full length of a vehicle. The recommended aperture range for full-car shots is f/8 to f/11, which keeps the hood, body, and rear in acceptable focus simultaneously. When you shift to detail shots like a badge, wheel spoke, or stitching on a steering wheel, opening up to f/2.8 or f/4 isolates the subject and creates a more intentional, editorial feel.
ISO discipline matters more in automotive work than in most other genres. Smooth body panels and metallic paint amplify digital noise in ways that skin or fabric simply do not. Keeping ISO at 100 to 200 preserves the clean gradients across a hood or door panel that make a luxury car look expensive rather than grainy. A sturdy tripod makes this possible even in lower light conditions.
Shutter speed depends entirely on whether the car is moving. For static shots on a tripod, anything from 1/125s to several seconds works fine. For panning shots where you track a moving car to blur the background while keeping the vehicle sharp, 1/60s to 1/30s produces the motion effect that communicates speed. Always shoot RAW. The highlight and shadow recovery available in RAW files is the difference between saving a chrome detail blown out by direct sun and losing it permanently.
Pro Tip: A circular polarizing (CPL) filter is the single most impactful accessory you can add to your kit. Described by working automotive photographers as the “single best $30 accessory” for the genre, a CPL cuts reflections on paint and glass, deepens sky color, and increases contrast outdoors without any post-processing work.
The gear list for serious automotive work centers on a DSLR or mirrorless camera with full manual mode control, a mid-range zoom lens covering 24mm to 70mm, a quality tripod, and that CPL filter. A wide-angle lens in the 16mm to 24mm range adds drama for environmental shots, while a short telephoto around 85mm to 135mm compresses perspective and flatters body lines on static hero shots.
How does lighting and angle selection influence car photography results?
Light and angle are the two variables that separate forgettable car photos from images that stop a viewer mid-scroll. Positioning and light selection matter more than camera settings in automotive work, because no amount of exposure adjustment fixes a reflection of a parking lot in the hood of a Ferrari.
Timing your shoot for the best natural light
Golden hour, the 30 to 60 minutes after sunrise and before sunset, produces warm directional light that sculpts vehicle contours and creates long, flattering shadows across body lines. Overcast conditions work as a natural giant softbox, producing soft shadows and accurate colors that suit silver, white, and light-colored vehicles particularly well. Harsh midday sun creates blown-out highlights on hoods and roofs while casting dark, unflattering shadows under bumpers and wheel arches. Avoiding it is not a preference. It is a technical necessity.
Angle selection controls two things simultaneously: composition and reflection management. The industry-standard starting point for any vehicle is the three-quarter front view, positioned at roughly 45 degrees to the front corner of the car. This angle shows the front fascia, one full side, and enough of the roof to communicate the vehicle’s proportions. It conveys motion and character in a single frame. From there, you build a shot list that includes the three-quarter rear, full profile, and detail shots.
Pro Tip: Before adjusting any camera setting, move your position a few degrees to fix an unwanted reflection. Because clear coat creates near-specular reflections, a two-foot lateral shift often eliminates a distracting sky reflection or building that no filter or editing tool can cleanly remove.
- Shoot with the sun at roughly 45 degrees behind you to light the near side of the car without blinding the lens
- Position the vehicle so the background complements rather than competes with the subject
- Use roads, architecture, or natural terrain as leading lines that draw the eye toward the car
- Avoid placing the horizon line directly through the middle of the vehicle in profile shots
- Treat the environment as part of the story, not just a backdrop
The most common beginner mistake in car photography is treating the vehicle as a generic object rather than a reflective, three-dimensional subject with its own light behavior. Safe angles, harsh light, and boring backgrounds produce forgettable results regardless of the camera used.
What compositional techniques make automotive photos stand out?
Composition in automotive photography follows the same foundational rules as any other genre, but the application is specific to the shape, scale, and reflective nature of vehicles.
The rule of thirds grid is your starting framework. Place the leading headlight or front wheel at a grid intersection rather than dead center, and the image immediately gains visual tension and movement. Intentional negative space, an open sky above a low-angle shot or an empty road ahead of the car, emphasizes the vehicle’s presence without crowding the frame.
For moving car shots, lead room is non-negotiable. Leaving space in front of the vehicle in the direction of travel tells the viewer the car is going somewhere. Cropping tight to the front of a moving car creates a claustrophobic, static feeling that contradicts the subject’s energy.
Hyperfocal focusing is a technique that maximizes depth of field for environmental shots where you want both the car and the background landscape in focus. A 24mm lens at f/11 focused at approximately 1.8 meters achieves sharpness from 0.9 meters to infinity, which covers the full vehicle and the environment behind it. The tradeoff is that anything closer than 0.9 meters will be soft, so foreground elements like gravel or road markings need to stay outside that zone.
| Shot type | Compositional priority |
|---|---|
| Three-quarter hero | Lead with front corner at grid intersection, sky as negative space |
| Full profile | Horizon above wheel centers, leading lines from road or architecture |
| Detail close-up | Shallow depth of field, single point of focus, clean background |
| Interior | Shoot from B-pillar angle, dashboard as leading line toward windshield |
| Panning motion | Generous lead room, background blur communicating speed |
Variety within a single shoot separates a professional delivery from a snapshot collection. Interior shots, wheel and tire details, badge close-ups, and engine bay images all tell different parts of the vehicle’s story and give clients or editorial buyers more options to work with.
How are reflections controlled during shooting and post-production?
Reflection management is the defining technical challenge of automotive photography. Specular reflections on glossy paint change dramatically with small camera or subject angle shifts, which means the fastest fix is always a physical adjustment on location rather than a software correction later.
The CPL filter handles a significant portion of outdoor reflection problems. Rotating the filter while looking through the viewfinder visibly reduces glare on windows and paint, particularly during golden hour when light hits glass at low angles. It does not eliminate all reflections, but it reduces the editing burden substantially.
Post-production follows a logical sequence that builds on a clean capture rather than rescuing a poor one:
- Correct white balance first to establish accurate paint color before any other adjustment
- Adjust exposure globally, then pull highlights and lift shadows to reveal detail in chrome and dark body panels
- Apply clarity and texture selectively to bring out surface detail without over-sharpening paint gradients
- Use sharpening and noise reduction in balance, particularly on high-ISO captures
- Remove distracting background elements with healing or clone tools, keeping edits honest and proportional
Pro Tip: Build a preset for each common shooting condition, golden hour, overcast, and studio, and apply it as a starting point for every image in that batch. Consistent presets cut editing time dramatically in commercial contexts without sacrificing quality.
Over-saturation is the most common post-processing mistake in car photography. Pushing vibrance and saturation beyond what the paint actually looks like misrepresents the vehicle, which matters enormously for dealership listings and private sales where buyers make decisions based on photos.
What practical workflows exist for commercial automotive photography?
Commercial automotive photography, particularly dealership work, operates under constraints that artistic shoots do not. Speed, consistency, and volume define the workflow more than creative latitude.
A standardized 12-angle shot list per vehicle covers every angle a buyer needs: three-quarter front, three-quarter rear, driver and passenger profiles, front and rear straight-on, all four wheels, interior front and rear, dashboard, and odometer. Shooting the same sequence for every car builds muscle memory and eliminates the risk of missing a required angle on a 40-car lot day.
Vehicle preparation directly affects editing time. A clean car with no water spots, dust, or fingerprints on glass requires far less retouching than one shot straight off the lot. Partnering with a detailing service or preparing the vehicle properly before a shoot is not optional in professional contexts. It is part of the workflow.
| Approach | Best for | Key tradeoff |
|---|---|---|
| DSLR/mirrorless with shot list | Dealerships, private collectors, editorial | Higher quality, slower throughput |
| Smartphone with AI background tools | High-volume lots, quick listings | Fast and consistent, limited creative control |
AI background replacement tools have changed high-volume dealership photography. They produce clean, consistent images regardless of lot clutter or weather, which removes one of the biggest bottlenecks in commercial workflows. The ethical boundary is clear: replace distracting backgrounds with neutral ones, but never alter the vehicle itself or misrepresent its condition.
Key takeaways
Automotive photography produces its best results when reflection management, light timing, and compositional discipline are applied together from the moment of capture rather than corrected in post-production.
| Point | Details |
|---|---|
| Camera settings foundation | Shoot at f/8 to f/11, ISO 100 to 200, always in RAW for maximum recovery flexibility. |
| Light timing is non-negotiable | Golden hour and overcast conditions produce the most flattering, reflection-controlled results. |
| Angle controls reflections | Moving the camera a few degrees physically is faster and more effective than any editing fix. |
| Composition drives impact | Use the rule of thirds, lead room, and hyperfocal focusing to build images with depth and direction. |
| Commercial workflows demand systems | A 12-angle shot list, clean vehicles, and AI background tools keep volume shoots consistent and efficient. |
What 35 years behind the lens taught me about shooting cars
After more than three decades photographing vehicles for over 550 magazine covers, the lesson that took longest to fully absorb is this: the camera is the last variable you should be thinking about on location. Every significant failure I have seen in automotive photography, including my own early work, came from arriving at a location without a plan for the light.
Reflection management starts before you raise the camera. I walk the vehicle before I shoot it, watching how the available light falls across the paint and where the clear coat is picking up sky, buildings, or my own silhouette. That walk takes three minutes and saves thirty minutes of editing. Most photographers skip it entirely.
Shooting during golden hour transforms an average car into a genuinely striking image. The warm directional light does work that no preset or filter can replicate. I have photographed the same vehicle at noon and at 6 PM and delivered images that looked like two different cars. The afternoon version sold. The noon version did not.
Cleanliness matters more than most photographers admit. I have turned down shoots because the client refused to detail the car first. A dirty vehicle in a photograph communicates carelessness, and no amount of retouching fully removes that impression. The Baldino Automotive blog covers preparation and workflow topics in depth for photographers who want to go further on this.
The balance between technical precision and artistic instinct is what makes automotive photography genuinely difficult. You can learn the settings in an afternoon. Learning to anticipate light, read a vehicle’s character, and build a shot list that tells a complete visual story takes years of deliberate practice.
— Ray
Work with Baldino Automotive for professional results
Baldinoautomotive brings over 35 years of specialized experience to every vehicle shoot, with a portfolio spanning luxury, exotic, and performance cars for dealerships, private collectors, and commercial clients. Ray Baldino holds Master Photographer certification from the Professional Photographers of America, and his work has appeared on more than 550 magazine covers. If you are ready to see what controlled lighting, disciplined composition, and deep technical knowledge produce for your vehicle or brand, explore professional automotive photography services tailored specifically to high-end vehicles. Baldinoautomotive delivers images that represent your vehicle accurately and compellingly, every time.
FAQ
What is the best aperture for car photography?
The best aperture for full-vehicle shots is f/8 to f/11, which keeps the entire car in sharp focus. For close-up detail shots, f/2.8 to f/4 isolates the subject with a shallow depth of field.
Why do car photos look bad in midday sun?
Midday sun creates harsh highlights on hoods and roofs while casting deep, unflattering shadows under bumpers and wheel arches. Golden hour and overcast conditions produce far more flattering, controllable light for automotive work.
How do you reduce reflections in car photography?
Changing your camera angle by even a few degrees is the fastest way to eliminate unwanted reflections on glossy paint. A CPL filter further reduces glare on paint and glass without post-processing.
Do you need to shoot RAW for automotive photography?
RAW format is the standard for professional automotive work because it preserves highlight and shadow detail in metallic paint and chrome that JPEG compression discards permanently.
What is a standard dealership photo shot list?
A professional dealership shot list covers 12 standardized angles per vehicle, including three-quarter front and rear, both profiles, straight-on front and rear, all four wheels, interior front and rear, dashboard, and odometer.

