
How to Create Dealership Vehicle Listing Photos That Sell
June 9, 2026
Creating dealership vehicle listing photos is the process of capturing comprehensive, consistent, and technically sound images of vehicles to drive online engagement and accelerate sales. Dealerships that treat photography as a structured workflow rather than an afterthought see measurable gains in click-through rates and buyer inquiries. This article covers the tools, shot lists, lighting conditions, and editing practices that produce professional results in-house, without a costly studio. You will also find workflow strategies that scale across an entire lot, drawing on platforms like Car Photo Checklist, CarPixAI, and AutoTrader’s published listing standards.
What tools and equipment do you need to create professional dealership vehicle photos?
The equipment required to create dealership vehicle listing photos is far more accessible than most dealership managers assume. Modern smartphones produced within the last five years deliver listing-ready image quality when lighting and staging are properly controlled. A dedicated DSLR or mirrorless camera improves resolution for luxury or exotic inventory, but it is not a prerequisite for everyday lot photography.
Beyond the camera, a short list of accessories separates acceptable photos from professional-grade ones:
- Microfiber cloths for removing fingerprints, dust, and smudges from glass and body panels before every shoot
- A step stool or small ladder to capture elevated front and rear three-quarter angles without distortion
- A tripod or stabilizing grip to hold consistent framing across multiple vehicles
- Cleaning supplies including a bucket, car wash soap, tire dressing, and an interior vacuum for pre-shoot prep
- AI background replacement tools such as CarPixAI, which deliver consistent clean backgrounds without requiring a physical studio setup
Shot-guide apps complete the toolkit. Car Photo Checklist, for example, locks the export function until every required angle and flaw photo has been submitted, which removes the guesswork from the process entirely.
| Tool | Purpose | Cost Range |
|---|---|---|
| Smartphone (recent model) | Primary capture device | Already owned |
| Microfiber cloths | Pre-shoot surface cleaning | Under $15 |
| Step stool | Elevated angle shots | $20 to $40 |
| Tripod or grip | Consistent framing | $30 to $80 |
| CarPixAI or similar | Background replacement | Subscription |
| Car Photo Checklist | Shot-list enforcement | Subscription |
Pro Tip: Clean the camera lens with a microfiber cloth before every vehicle. A smudged lens introduces haze that no editing tool can fully correct, and it is the single most overlooked cause of soft-looking lot photos.
Which vehicle shots and angles are essential for dealership listings?
AutoTrader recommends 15 to 20 photos per vehicle listing, with listings below 10 photos flagged as low quality. More photos directly improve click-through rates, so a disciplined shot list is not optional. It is the foundation of every high-performing listing.
The following sequence covers the required angles for a complete, marketplace-compliant listing:
- Front three-quarter hero shot (driver’s side, slight elevation) — this is the thumbnail image buyers see first
- Rear three-quarter shot (passenger side) — shows the full rear design and exhaust detail
- Driver’s side profile — full lateral view with the vehicle centered and level
- Passenger’s side profile — mirrors the driver’s side for symmetry
- Front straight-on — grille, headlights, and badge
- Rear straight-on — taillights, badging, and license plate area
- Wheel and tire detail — one close-up per corner, or at minimum the front driver’s side
- Dashboard and instrument cluster — full view with the display active if possible
- Driver’s seat and steering wheel — shows condition and feature level
- Rear seat area — legroom and upholstery condition
- Trunk or cargo area — open and empty
- Engine bay — clean and clearly lit
- Odometer reading — close-up with the ignition on
- Key features — sunroof, infotainment screen, premium audio badges
- Any documented flaws — scratches, chips, or wear areas photographed clearly for transparency
Buyers decide to engage within two seconds of seeing a listing thumbnail, which means the front three-quarter hero shot carries more weight than any other image. Sequence and clarity matter more than camera cost.
| Shot category | Minimum count | Priority level |
|---|---|---|
| Exterior angles | 6 | Critical |
| Interior views | 4 | High |
| Detail and feature shots | 3 | High |
| Flaw documentation | As needed | Required |
How to optimize lighting, backgrounds, and staging for consistent photos
Lighting is the single variable that separates a professional-looking vehicle photo from a flat, unappealing one. Overcast daylight or golden hour produces the most even, shadow-free illumination across a vehicle’s body panels. Artificial light sources alter color accuracy and reduce buyer trust, so avoid shooting under fluorescent lot lights or mixed indoor-outdoor conditions whenever possible.
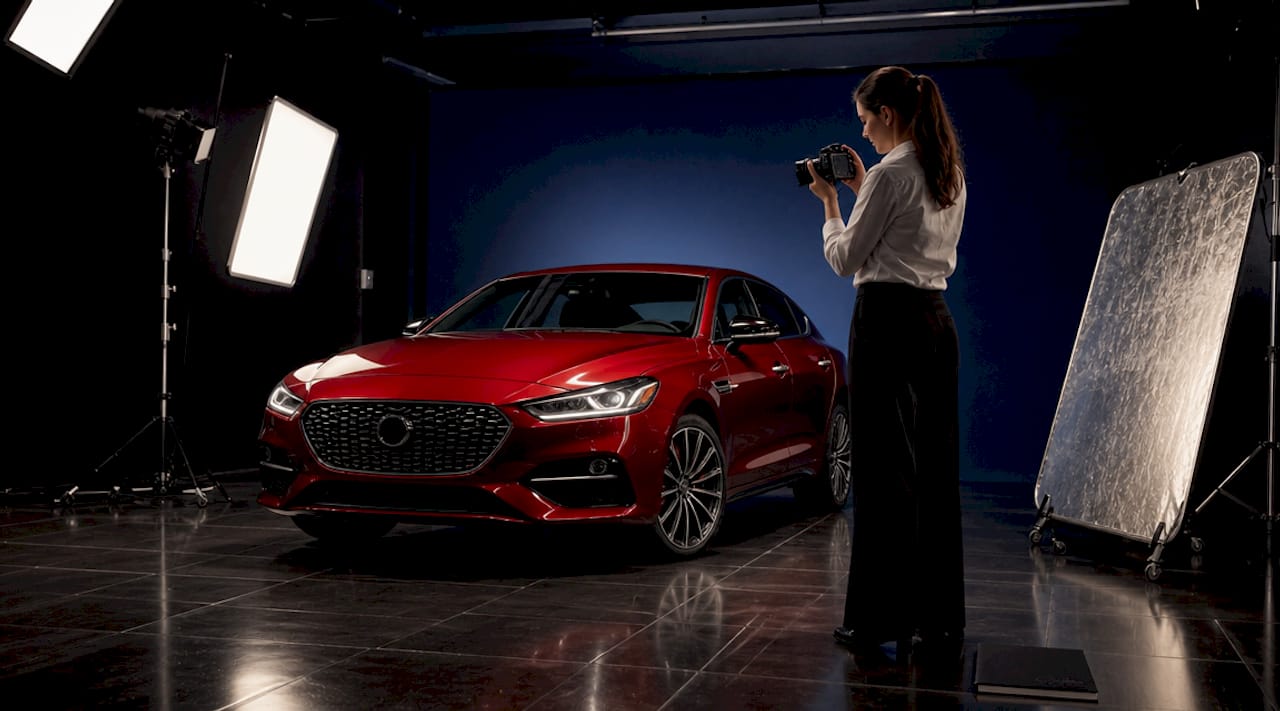
Staging and background choices carry equal weight. Photos with consistent, clean backgrounds rank higher on AutoTrader and similar platforms, while mixed or cluttered backgrounds are penalized in listing scores. A paved lot section with a plain building wall, an open sky, or a showroom floor all work well. What does not work: other vehicles in the frame, visible trash cans, utility poles, or staff walking through the shot.
Before the camera comes out, the vehicle must be prepared:
- Wash and dry the exterior completely, including the wheels and wheel wells
- Clean all glass surfaces inside and out to eliminate streaks
- Vacuum the interior and wipe down all hard surfaces
- Remove personal items, dealer tags hanging from mirrors, and any visible price stickers
- Apply tire dressing for a finished, showroom-ready appearance
- Open all windows slightly to avoid harsh reflections on the glass
Camera positioning matters as much as the environment. Shoot from a height that aligns with the midpoint of the vehicle’s body, roughly door-handle level, to avoid the distortion that comes from shooting too low or too high. Landscape orientation is mandatory. Portrait-format vehicle photos are immediately disqualifying on every major automotive marketplace.
Pro Tip: If your lot has no clean background, schedule shoots for early morning before traffic builds, and position the vehicle so the camera faces open sky rather than buildings or neighboring inventory. AI background replacement tools can correct the rest in post-processing.
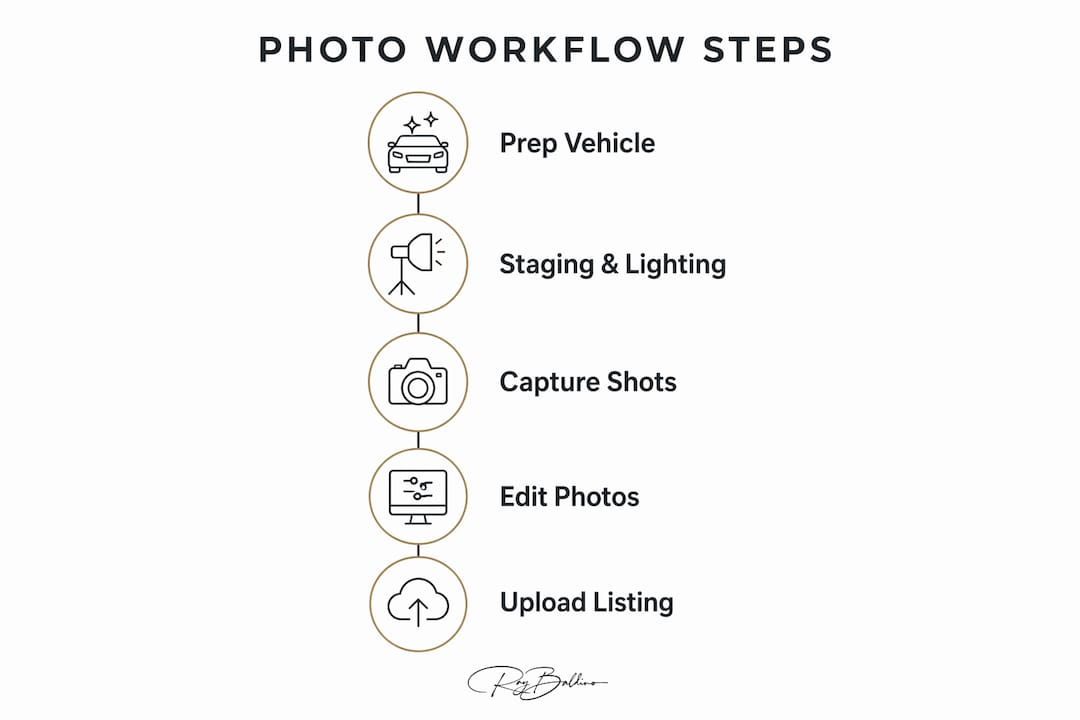
What is an efficient workflow to create dealership vehicle listing photos at scale?
A templated workflow is what separates a dealership that photographs 5 vehicles per day from one that photographs 10 or more. Dealerships using templated photo workflows roughly double their vehicle photo throughput within a standard shift compared to unstructured shooting. The gain comes from eliminating retakes, missed angles, and the time spent deciding what to shoot next.
A repeatable process for lot-scale photography looks like this:
- Group vehicles by type before the shoot day begins. Sedans, SUVs, and trucks each have slightly different shot templates. Batching by type reduces setup adjustments between vehicles.
- Prep all vehicles first, then shoot. Washing and staging a group of five vehicles before picking up the camera is faster than alternating between prep and shooting.
- Open your shot-guide app and follow the sequence without deviation. Car Photo Checklist enforces this by disabling export until all required angles and flaw photos are submitted.
- Shoot exterior angles first, then interior, then detail shots. This sequence minimizes the number of times you reposition around the vehicle.
- Document every flaw with a close-up photo and a note. This creates an audit trail that protects the dealership in trade-in and warranty disputes.
- Batch edit using a consistent preset or AI tool before uploading. Editing 10 vehicles at once is faster than editing one at a time.
- Upload in the correct sequence to your DMS or listing platform, with the hero shot placed first.
| Workflow stage | Time estimate per vehicle | Key tool |
|---|---|---|
| Vehicle prep and staging | 10 to 15 minutes | Cleaning supplies |
| Photo capture | 10 to 12 minutes | Smartphone or camera |
| Flaw documentation | 2 to 5 minutes | Car Photo Checklist |
| Batch editing | 3 to 5 minutes | CarPixAI or similar |
| Upload and sequencing | 3 to 5 minutes | DMS or listing platform |
Pro Tip: Assign one person to prep and one to shoot when volume is high. The prep-to-shoot handoff is where most dealership photo workflows lose time. Separating the roles keeps both tasks moving without interruption.
How to edit and upload vehicle photos effectively for dealership listings
Editing vehicle listing photos requires restraint. Minimal editing that preserves the vehicle’s true appearance builds buyer trust, while heavy filters and artificial enhancements create expectations the physical vehicle cannot meet. AutoTrader explicitly prohibits watermarks and logos on main listing images, and most other platforms follow the same standard.
The editing checklist for compliant, high-quality listing photos includes:
- Color correction only: adjust white balance and exposure to match real-world appearance, not to make the vehicle look better than it is
- Background replacement if needed: use AI tools like CarPixAI to swap a cluttered lot background for a clean, neutral one without altering the vehicle itself
- Compression management: export at the platform’s recommended resolution to avoid quality loss from over-compression or file rejection from oversized uploads
- No heavy filters, vignettes, or HDR effects: these read as unprofessional on automotive marketplaces and reduce buyer confidence
- No stock photos: every image must show the actual vehicle being sold, not a representative model
Photo ordering on the listing platform is as important as the photos themselves. Place the front three-quarter hero shot first, follow with the remaining exterior angles, then interior, then details. Consistent photo styling across your entire inventory builds brand professionalism and signals to buyers that your dealership operates with discipline. Refresh photos whenever a vehicle’s condition changes or after reconditioning work is completed. Stale photos with visible lot dust or seasonal backgrounds undermine credibility.
The digital car buying process in 2026 means buyers complete most of their evaluation online before ever contacting a dealership. The photo set is your first and often only chance to make a strong impression.
Key takeaways
Consistent, well-sequenced vehicle photos built on a structured workflow are the single most controllable factor in dealership listing performance.
| Point | Details |
|---|---|
| Photo count drives engagement | AutoTrader recommends 15 to 20 photos per listing; fewer than 10 flags the listing as low quality. |
| Equipment is secondary to process | A recent smartphone with proper lighting and staging outperforms expensive gear used without discipline. |
| Lighting and background are non-negotiable | Overcast daylight and clean backgrounds improve listing rank; clutter and mixed light reduce buyer trust. |
| Templated workflows double output | Structured shot-list apps like Car Photo Checklist allow dealerships to roughly double photo throughput per shift. |
| Editing must preserve truth | Minimal color correction is acceptable; heavy filters, watermarks, and stock photos violate platform standards and erode trust. |
What 35 years behind the lens taught me about dealership photos
The most common mistake I see in dealership photography has nothing to do with equipment. It is the absence of a repeatable process. A lot photographer with a checklist and a clean smartphone will consistently outperform one with a professional camera and no structure. I have seen this play out across hundreds of dealership visits over three and a half decades.
The second mistake is treating every vehicle the same. A pre-owned economy sedan and a certified pre-owned luxury SUV are not the same photographic assignment. The sedan needs clean, honest documentation. The SUV needs controlled lighting, careful interior staging, and detail shots that justify its price point. Applying a one-size approach to both produces photos that serve neither vehicle well.
Technology has genuinely changed what is possible for in-house dealership teams. AI background replacement, shot-guide apps, and smartphone cameras with computational photography have removed most of the technical barriers that once required a professional studio. What technology cannot replace is the judgment to know when a vehicle needs more than a standard lot workflow. Exotic, luxury, and performance vehicles still benefit from the kind of controlled, deliberate image construction that only comes from deep photographic experience. For those vehicles, the investment in professional photography is not a luxury. It is a sales decision.
My recommendation to every dealership marketing team is this: build the workflow first, train your team on it, and enforce it with a checklist app. Then identify the vehicles in your inventory that deserve a higher level of attention, and bring in a professional for those. The combination of disciplined in-house photography and targeted professional work is the most cost-effective approach available.
— Ray
How Baldinoautomotive supports dealerships with professional automotive photography
Baldinoautomotive, led by Ray Baldino, a Master Photographer with over 35 years of experience and more than 550 magazine covers, specializes in high-end automotive photography for dealerships, private collectors, and commercial clients. When your inventory includes luxury, exotic, or performance vehicles that demand more than a standard lot workflow, Baldinoautomotive delivers the controlled lighting, disciplined execution, and technical precision those vehicles require. Ray’s certification from the Professional Photographers of America and his deep expertise in automotive photography techniques ensure every image enhances marketability. Contact Baldinoautomotive to discuss how professional photography can support your dealership’s listings. Learn more about hiring an automotive photographer for your dealership.
FAQ
How many photos should a dealership listing include?
AutoTrader recommends 15 to 20 photos per vehicle listing. Listings with fewer than 10 photos are flagged as low quality, which reduces their visibility and click-through rates.
Can a smartphone produce professional dealership listing photos?
Yes. Smartphones produced within the last five years deliver listing-ready quality when lighting, staging, and a structured shot list are applied consistently. Camera hardware is less important than the conditions and process surrounding the shoot.
What is the best lighting for vehicle listing photos?
Overcast daylight or golden hour provides the most even, shadow-free illumination for vehicle photography. Artificial and mixed light sources alter color accuracy and reduce buyer confidence in the listing.
How does a photo checklist app improve dealership workflow?
Apps like Car Photo Checklist enforce a standardized shot sequence and disable export until all required angles and flaw photos are submitted. This structure allows experienced photographers to roughly double their output per shift by eliminating retakes and missed shots.
What editing is acceptable for dealership vehicle listing photos?
Minimal color correction and white balance adjustment are acceptable. AutoTrader and most platforms prohibit watermarks, logos, heavy filters, and stock photos on listing images. Every photo must accurately represent the actual vehicle being sold.

